1. Mawu Oyamba
This manual provides essential information for the safe and effective use of your VEVOR Squat and Rowing Machine. Please read and understand all instructions before assembly and operation. Keep this manual for future reference.
2. Zambiri Zachitetezo
- Funsani dokotala musanayambe ntchito iliyonse yolimbitsa thupi.
- Ensure all parts are securely assembled and tightened before each use.
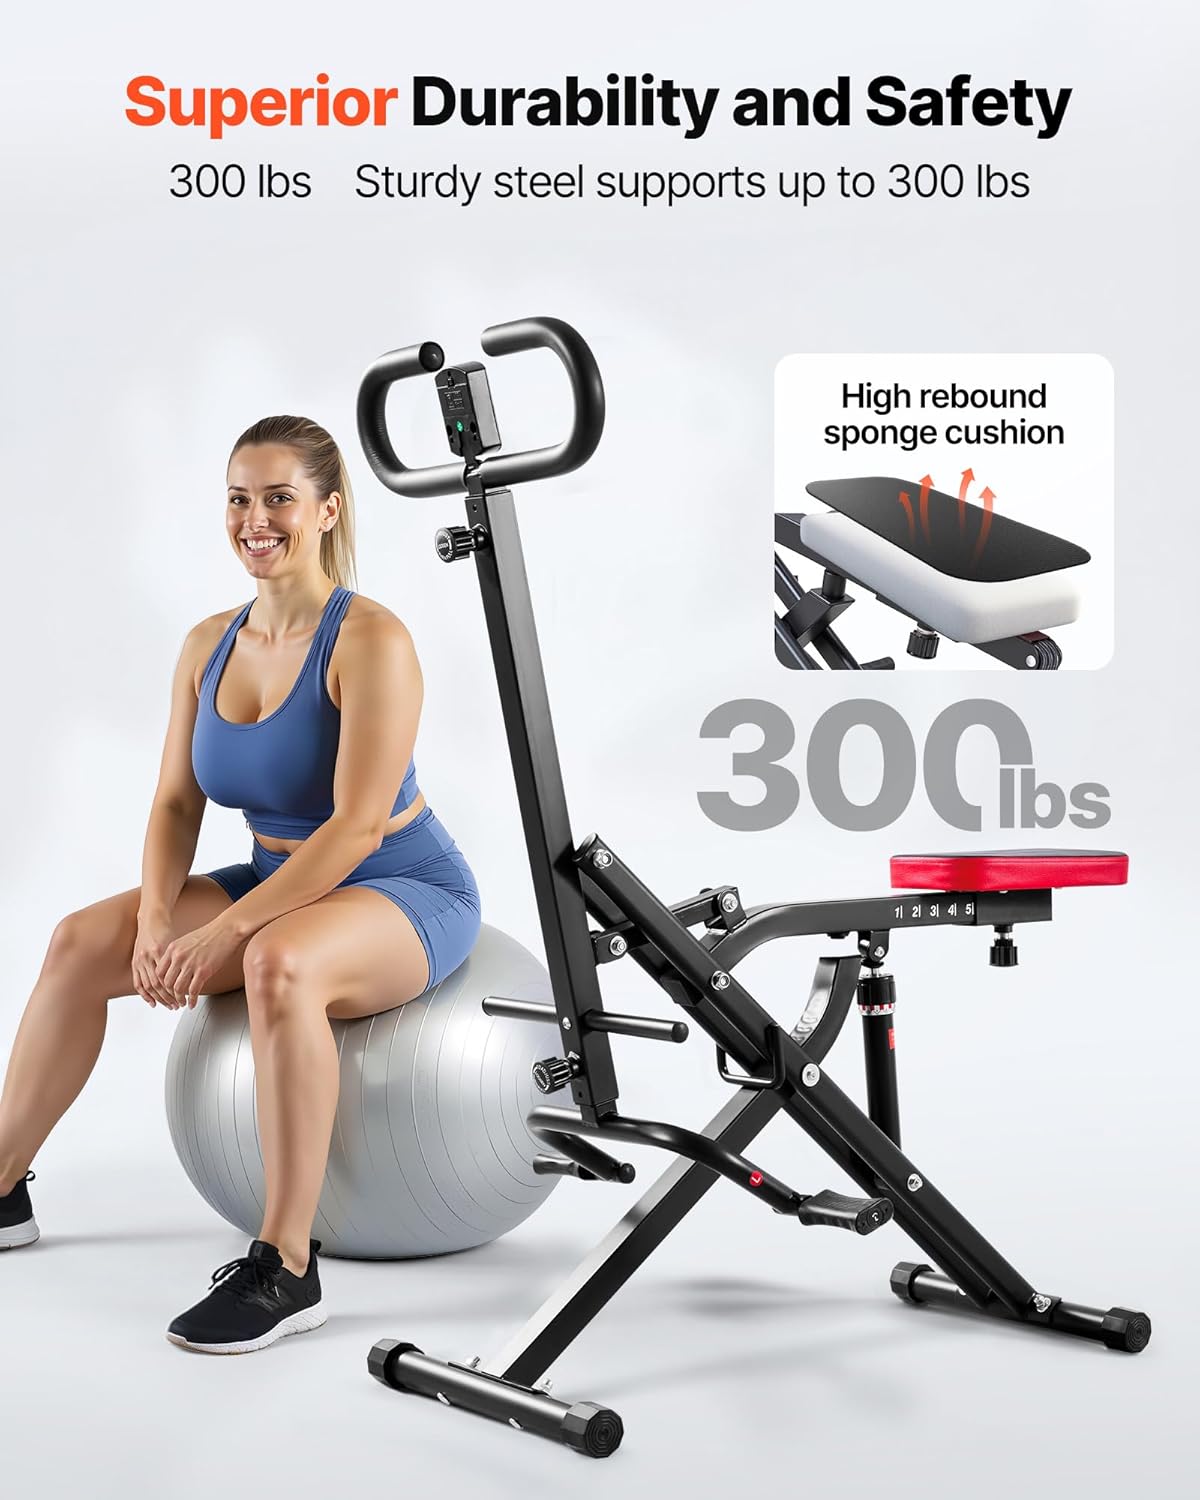
- Musapitirire kulemera kwakukulu kwa 300 lbs (136 kg).
- Sungani ana ndi ziweto kutali ndi makina pamene mukugwira ntchito.
- Gwiritsani ntchito makinawo pamalo osalala komanso okhazikika.
- Valani nsapato ndi zovala zoyenera zamasewera.
- Siyani kuchita masewera olimbitsa thupi nthawi yomweyo ngati mukumva kuwawa, chizungulire, kapena kusapeza bwino.
- Inspect the machine for any damage or wear before each use. Do not use if damaged.
3. Zomwe zili mu Bokosi
Chotsani mosamala zinthu zonse ndipo onetsetsani kuti mwalandira zinthu zotsatirazi:
- 1 x Squat Machine (main frame components)
- 1 x Counter (without battery, without wire)
- 1 x Buku la ogwiritsa (chikalata ichi)
- 2 x Open-End Wrenches
- 3 x Pull Pins
- 1 x Buffer Pad
Chithunzi 1: Zida zonse zomwe zikuphatikizidwa mu phukusi.
4. Malangizo a Msonkhano
Follow these steps to assemble your VEVOR Squat and Rowing Machine. For a visual guide, please refer to the installation video below.
Video 1: Step-by-step installation guide for the VEVOR Squat Machine.
- Attach the Main Frame: Connect the two main frame sections using the provided bolts and wrenches. Ensure they are securely fastened.
- Install the Hydraulic Cylinder: Secure the hydraulic resistance cylinder to the designated points on the main frame.
- Assemble the Seat Mechanism: Attach the seat support arm to the main frame, ensuring the adjustment mechanism is correctly aligned.
- Ikani Mpando: Place the padded seat onto the seat support arm and secure it with the appropriate fasteners.
- Onjezani Zogwirira Ntchito: Insert the handlebar assembly into the top of the main frame and secure it with the provided pin and knob.
- Ikani Zopumira Mapazi: Attach the footrests to the lower part of the frame.
- Connect the Counter: Mount the LCD counter onto the handlebar assembly.

Figure 2: Assembling the main frame components.
5. Malangizo Ogwiritsira Ntchito
5.1 Adjusting the Seat Length
The seat length can be adjusted across 5 levels to accommodate users of various heights and to target different muscle groups. To adjust, locate the spring turnbuckle beneath the seat, pull it out, slide the seat to your desired position (1-5), and release the turnbuckle to lock it in place.

Figure 3: Seat length adjustment mechanism.
5.2 Kusintha Kukaniza
The machine is equipped with a 12-level adjustable hydraulic cylinder to customize your workout intensity. Rotate the knob on the hydraulic cylinder to increase or decrease resistance. Higher numbers indicate greater resistance.

Figure 4: Hydraulic resistance adjustment.
5.3 Using the LCD Counter
The built-in LCD counter tracks your workout progress in real-time. It displays metrics such as time, count (reps), and estimated calories burned. Use the button on the counter to cycle through display modes or reset values.

Figure 5: LCD counter display.
5.4 Performing Exercises
The VEVOR Squat and Rowing Machine is designed to facilitate deep squats and rowing movements, engaging glutes, legs, core, and upper body muscles. Maintain proper form throughout your workout. Keep your back straight, engage your core, and control the movement both on the way down and up.
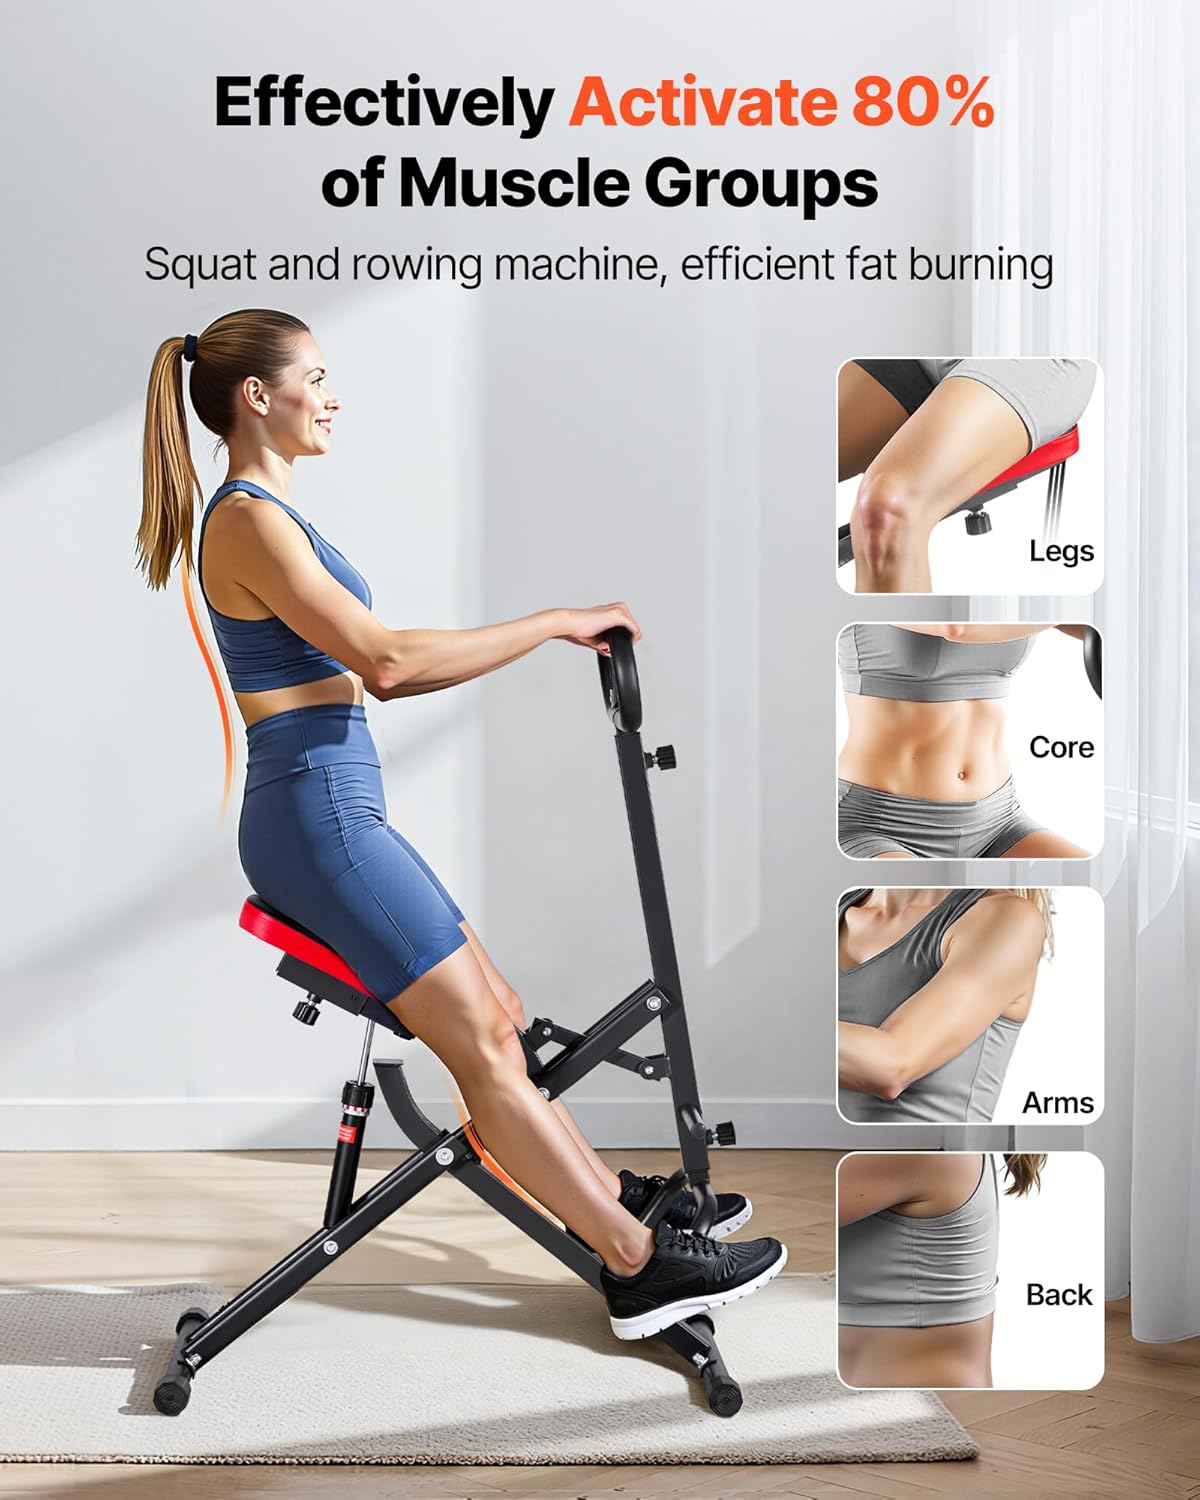
Figure 6: Proper exercise form on the machine.
6. Kusamalira
- Kuyeretsa: Pukutani pansi makina ndi malondaamp nsalu ikatha kugwiritsidwa ntchito nthawi iliyonse kuti muchotse thukuta ndi fumbi. Pewani zotsukira zokhwimitsa.
- Kuyendera: Yang'anani pafupipafupi mabawuti, mtedza, ndi magawo onse osuntha ngati akulimba ndi kutha. Mangitsani zomangira zilizonse zotayirira.
- Mafuta: The hydraulic cylinder is maintenance-free. No additional lubrication is required for the main moving parts.
7. Kusungirako
The VEVOR Squat and Rowing Machine features a foldable design for convenient storage. To fold, lift the handle grip up and rotate the machine to collapse the frame. This compact footprint allows for easy storage in closets, corners, or under beds, making it ideal for small spaces.

Figure 7: Foldable design for space-saving storage.
8. Mavuto
- Machine feels unstable: Ensure the machine is on a flat surface. Check all bolts and nuts for tightness.
- Kukana sikusintha: Verify that the hydraulic cylinder adjustment knob is correctly engaged and rotated to the desired level.
- LCD Counter not working: Check if the counter requires batteries (though typically battery-free for this model, verify connections). Ensure it is properly mounted.
9. Zofotokozera
| Mbali | Kufotokozera |
|---|---|
| Dzina lachitsanzo | Makina a Squat |
| Mtundu | VEVOR |
| Mtundu | Wakuda |
| Zakuthupi | Aloyi Chitsulo |
| Resistance Mechanism | Zopangidwa ndi Hydraulic |
| Kunenepa Kwambiri Malangizo | 300 mapaundi |
| Kulemera kwa chinthu | 25.8 mapaundi |
| Chiwerengero cha Magawo Otsutsa | 12 |
| Makulidwe a Phukusi L x W x H | 36.61 x 11.02 x 8.27 mainchesi |
| Item Dimensions LxWxH (Unfolded) | 22.83 x 35.43 x 44.09 mainchesi |

Chithunzi 8: Makulidwe azinthu ndi mawonekedwe ake.
10. Chitsimikizo ndi Thandizo
Kuti mudziwe zambiri za chitsimikizo kapena chithandizo chaukadaulo, chonde onani zomwe mwagula kapena pitani ku VEVOR yovomerezeka webmalo. Sungani lisiti yanu yogulira ngati umboni wogula.


