1. Chiyambi ndi Kupitiliraview
The VEVOR DWC Hydroponic System is designed to provide an optimal growing environment for various crops, ensuring they receive adequate water, oxygen, and nutrients. This system promotes healthy root development, leading to superior plant growth and higher yields compared to traditional soil planting methods. It is suitable for both indoor and outdoor use, including grow tents, greenhouses, balconies, and gardens.
This kit includes 4 planting buckets, an air pump, air stones, water level devices, and all necessary tubing and connectors for a complete hydroponic setup.
2. Zigawo Zophatikizidwa
The VEVOR DWC Hydroponic System comes with the following components:
- 4 x 5-Gallon PP Planting Buckets with Lids
- 1 x Air Pump (110V/60HZ, 8W, 4 x 4L/min Air Flow)
- 4 x Air Stones
- 4 x Water Level Devices
- 4 x Inline Check Valves
- 1 x Set of Connectors and Tubing (6m air hose)
- Clay Pebbles (growing medium)
- 1 x Buku la Malangizo
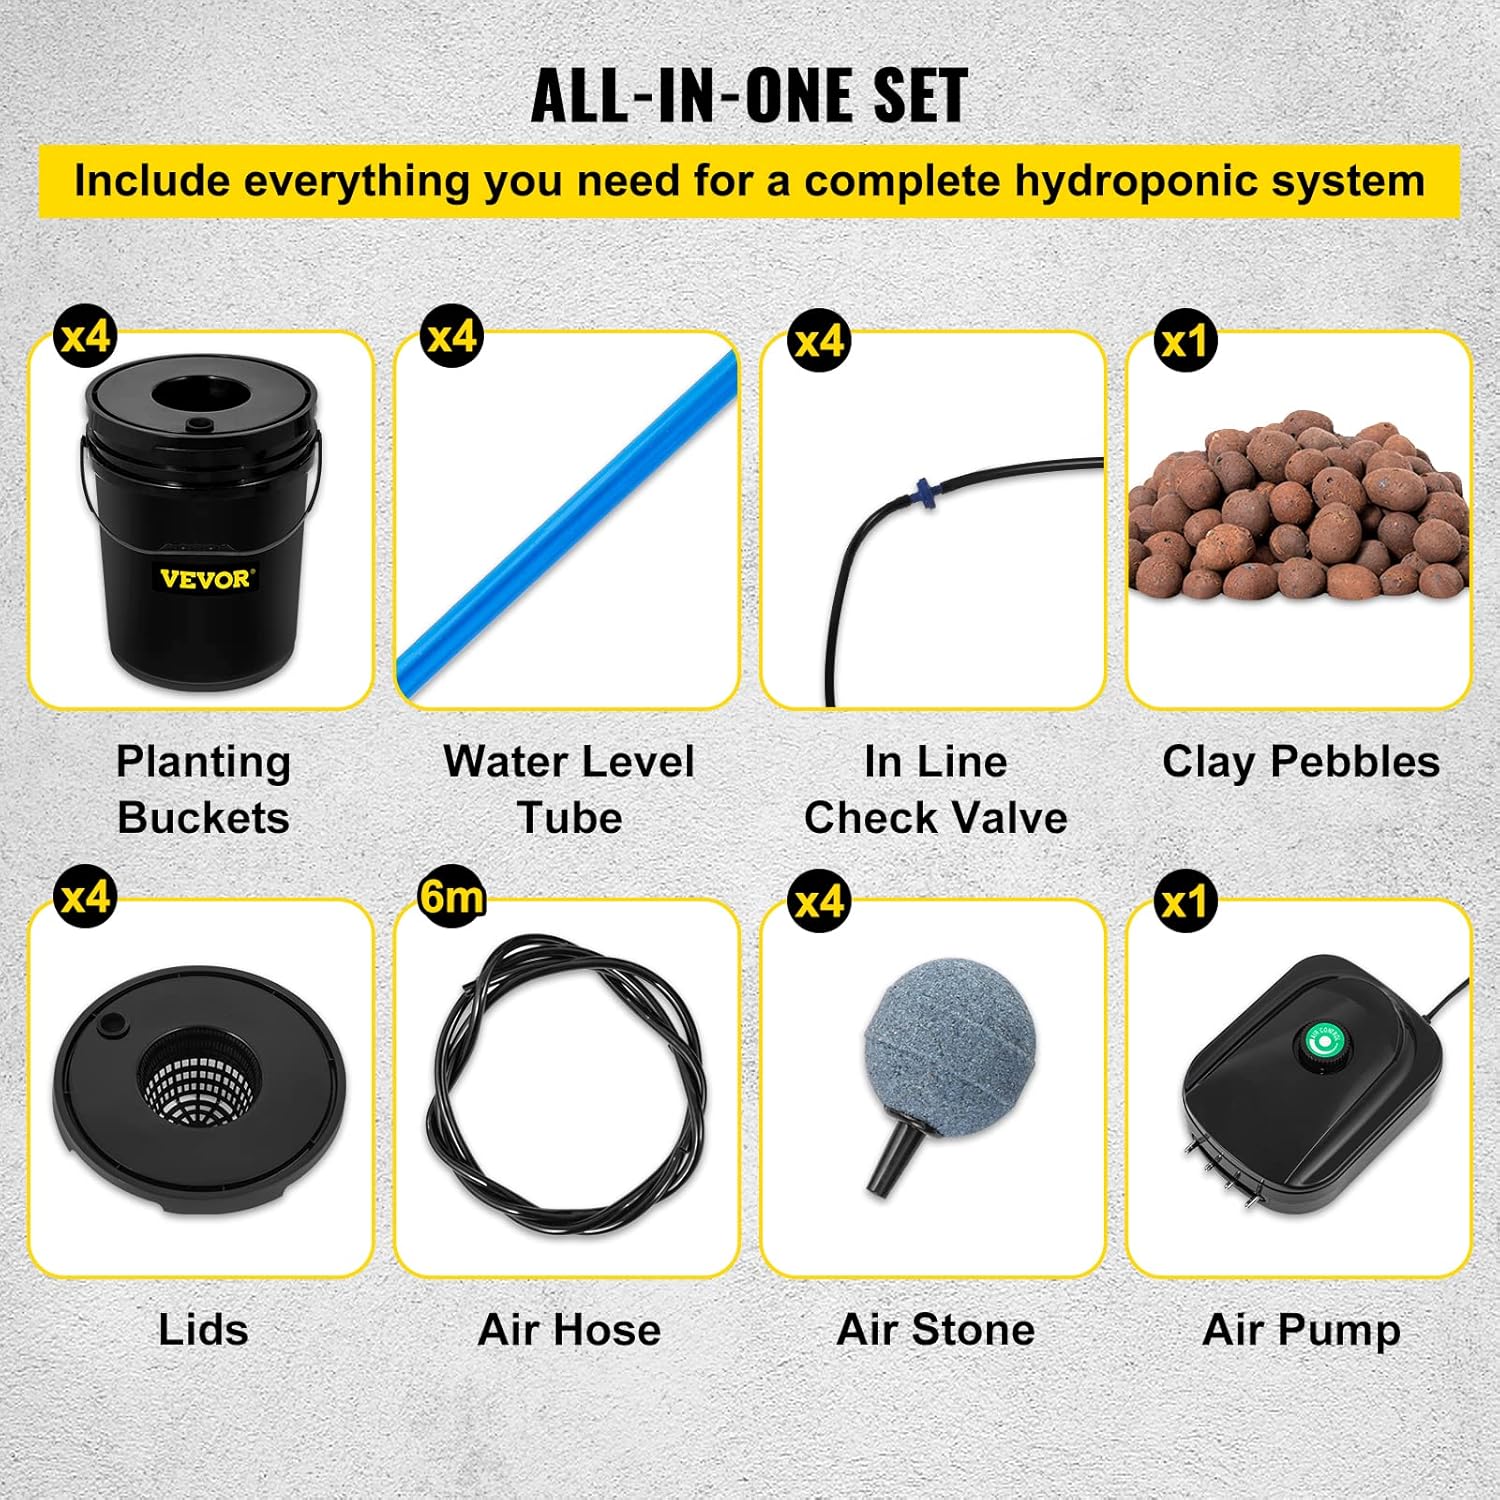
Chithunzi 2.1: Kuthaview of all included components for the VEVOR DWC Hydroponic System.
3. Malangizo Kukhazikitsa
Follow these steps to assemble your VEVOR DWC Hydroponic System:
3.1 Prepare the Buckets
- Install Seal Rings: Insert the provided black rubber seal rings into the pre-drilled holes on each bucket. Ensure they are seated firmly to prevent leaks.
- Assemble Water Level Pipes: Cut the blue water level pipe to the desired length for each bucket. Attach the connectors to both ends and insert one end into the designated hole on the side of each bucket. This allows for visual monitoring of the water level.

Figure 3.1: Water level device and check valve installation on a bucket.
3.2 Connect Air System
- Connect Air Stones: Attach one air stone to the end of each black air hose.
- Insert Air Hoses: Thread the air hoses through the small holes in the bucket lids and extend them to the bottom of each bucket, ensuring the air stone rests on the bottom.
- Connect to Air Pump: Connect the other ends of the air hoses to the air pump's outlets. Use the provided connectors and inline check valves to ensure proper airflow and prevent backflow.

Figure 3.2: Air pump and tubing connections to the hydroponic buckets.
Video 3.1: Official VEVOR video demonstrating the Deep Water Culture system setup and function.
3.3 Prepare Growing Medium and Plants
- Rinse Clay Pebbles: Thoroughly rinse the clay pebbles to remove any dust or debris.
- Place Plants: Gently remove your plant seedlings from their original medium, carefully washing off any soil from the roots. Place the plant in the net pot (integrated into the lid) and fill around the roots with the rinsed clay pebbles to secure the plant. Ensure the roots extend through the bottom of the net pot.

Figure 3.3: Plant secured in the net pot with clay pebbles, ready for nutrient solution.
4. Malangizo Ogwiritsira Ntchito
4.1 Adding Water and Nutrients
- Fill Buckets: Fill each bucket with water, ensuring the water level is just below the bottom of the net pot. The roots should not be submerged initially to encourage them to grow downwards towards the water.
- Add Nutrient Solution: Add your preferred hydroponic nutrient solution according to the manufacturer's instructions. Monitor the pH and EC/TDS levels to ensure they are within the optimal range for your specific plants.
- Cover Buckets: Place the lids with the plants onto the buckets.
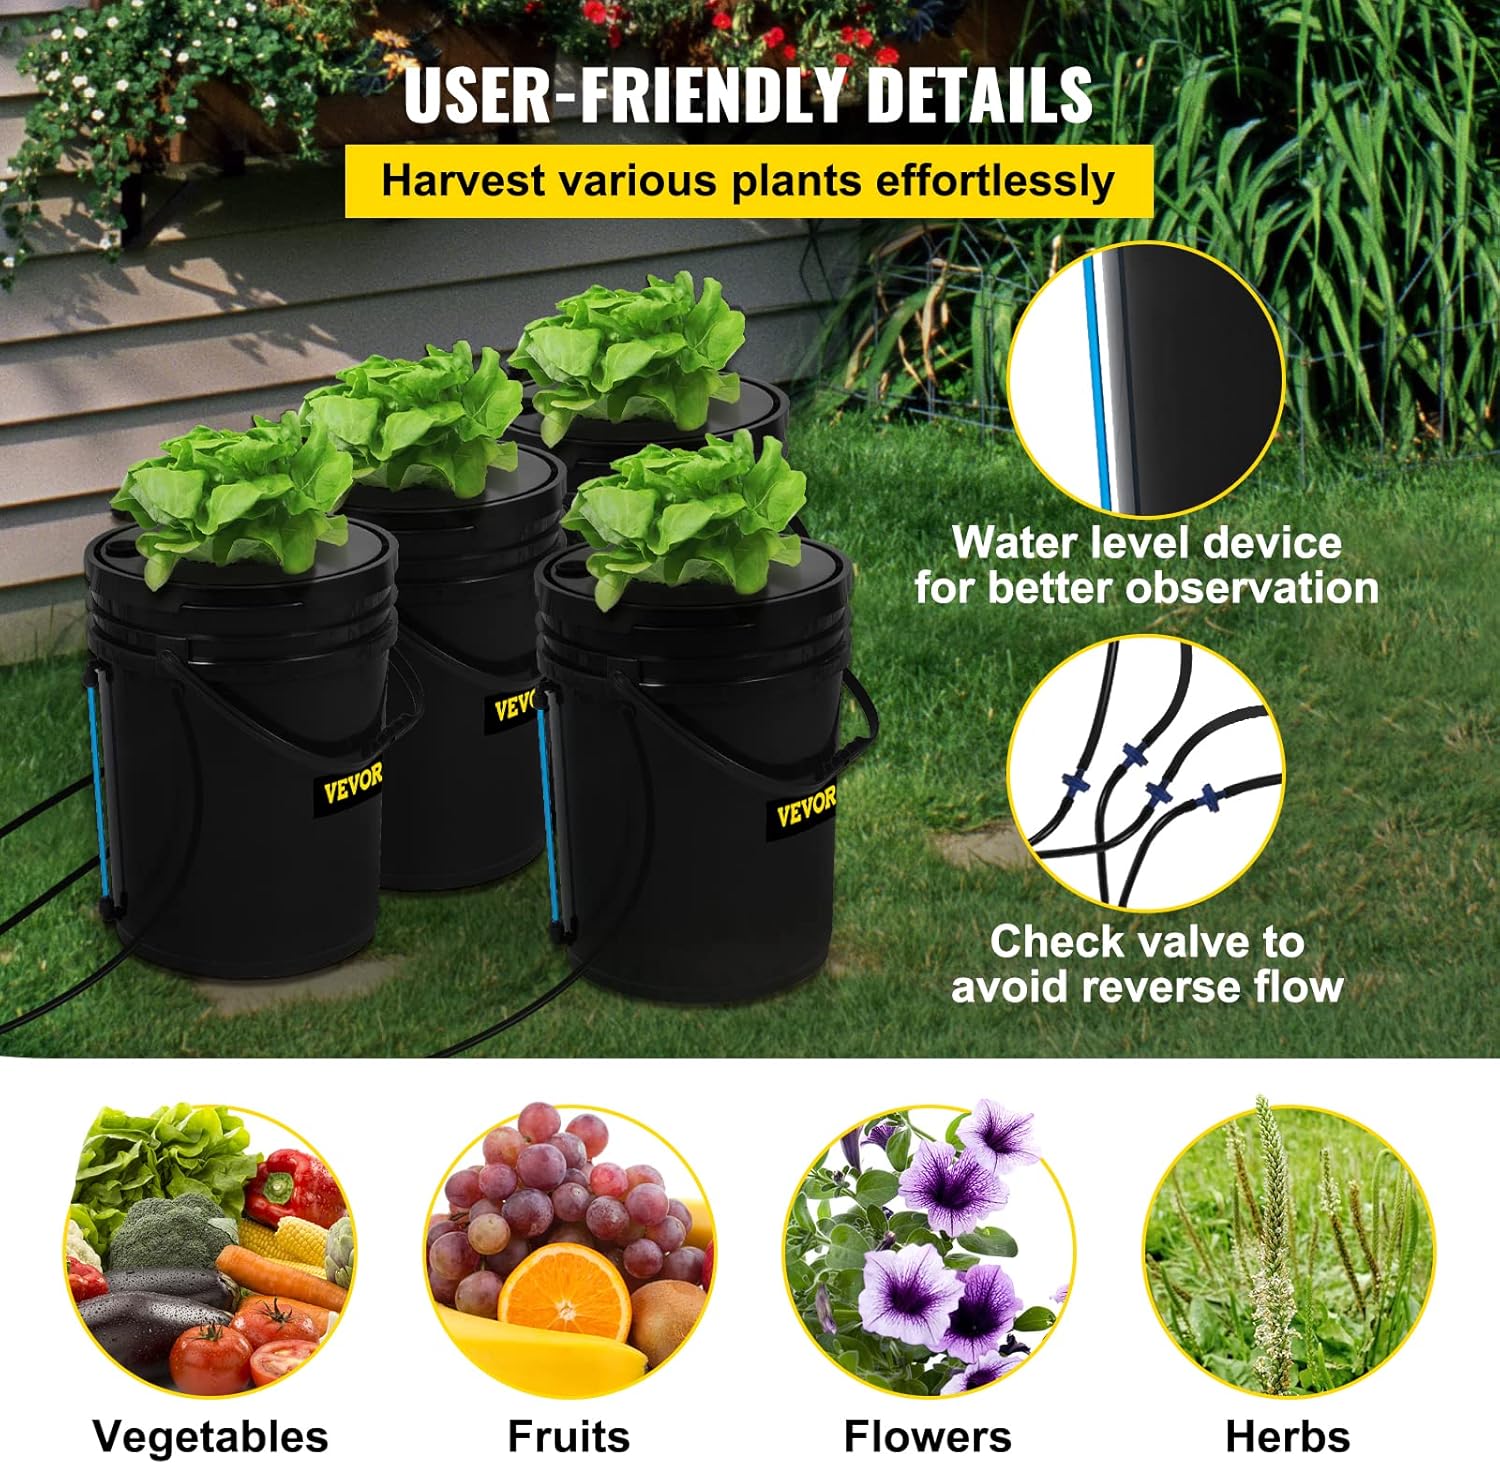
Figure 4.1: User-friendly design features for easy monitoring and maintenance.
4.2 Kukhazikitsa Mphamvu pa Dongosolo
- Connect Air Pump: Plug the air pump into a suitable power outlet. The air pump will continuously oxygenate the nutrient solution, which is crucial for root health and plant growth.
- Yang'anirani Mulingo wa Madzi: Regularly check the water level using the external water level device. Refill with fresh water and nutrient solution as needed.
5. Kusamalira
- Nutrient Solution Changes: Replace the entire nutrient solution every 1-2 weeks to prevent nutrient imbalances and pathogen buildup.
- Kuyeretsa: Periodically clean the buckets, air stones, and tubing to remove algae and mineral deposits. Use a mild cleaning solution and rinse thoroughly.
- Kuwona Pampu ya Air: Ensure the air pump is functioning correctly and providing consistent aeration. Clean air stones if airflow appears reduced.
- Kuyang'anira Mulingo wa Madzi: Consistent water levels are vital. Top off with fresh water between full solution changes.
6. Mavuto
- Wilting Plants: Check water level and ensure roots are reaching the solution. Verify air pump is working to provide oxygen.
- Yellowing Leaves: This may indicate a nutrient deficiency or imbalance. Check pH and EC/TDS levels of the nutrient solution.
- Kukula kwa Algae: Ensure buckets are light-proof to prevent algae. Regular cleaning and solution changes will also help.
- Pampu Sikugwira Ntchito: Check power connection. Ensure air hoses and air stones are not clogged.
- Kutuluka kwa Madzi: Verify all seal rings and connections are properly installed and tightened.
7. Zofotokozera
| Mbali | Kufotokozera |
|---|---|
| Mtundu | VEVOR |
| Chitsanzo | DWC Hydroponic System 4 Buckets |
| Bucket Material | PP (Polypropylene) |
| Mphamvu ya Chidebe | 5 Gallon / 23 L (per bucket) |
| Bucket Size | 12 x 15 mainchesi / 30 x 38 masentimita |
| Air Pump Voltage | 110V/60HZ |
| Mphamvu ya Pampu ya Air | 8 W |
| Mayendedwe ampweya | 4 x 4 L/Min |
| Mlingo wa Phokoso | 40db |
| Kutalika kwa Air Hose | 19.7 ft / 6 m |
| Kulemera kwa chinthu | 15.43 mapaundi |

Figure 7.1: Dimensions of the VEVOR DWC Hydroponic bucket.
8. Zambiri Zachitetezo
- Always ensure the air pump is placed in a dry location, away from water splashes.
- Do not submerge the air pump in water.
- Regularly inspect all electrical connections for damage.
- Sungani kutali ndi ana ndi ziweto.
- Use only hydroponic-specific nutrient solutions.
- Ensure proper ventilation if used indoors.
9. Chitsimikizo ndi Thandizo
VEVOR products typically come with a warranty. For specific warranty details, technical support, or to register your product, please visit the official VEVOR website or contact their customer service. Refer to the packaging or the included warranty card for contact information.
VEVOR is committed to providing quality products and support. For any issues or questions, please reach out to their dedicated support team.