
1. Mawu Oyamba
This manual provides detailed instructions for the safe and effective use of your JOREST 155-in-1 Precision Electric Screwdriver. This versatile tool is designed for precision repair tasks on various electronic devices. Please read this manual thoroughly before operation and retain it for future reference.
2. Zomwe zili mu Bokosi
Your JOREST 155-in-1 Precision Electric Screwdriver kit includes the following components:
- Electric Handle
- Manual Handle
- 140 Precision Bits (various specifications)
- 13 Additional Accessories (including triangular spudger, metal pry bar, flexible shaft, anti-static wrist wrap, suction cup, tweezers, magnetic mat)
- Type-C USB Charging Chingwe
- Magnetic and Durable Storage Case
- Buku Logwiritsa Ntchito

Chithunzi: Zathaview of the JOREST 155-in-1 Precision Electric Screwdriver kit, showcasing the electric handle, manual handle, various bits, and accessories within its storage case.
3. Kukhazikitsa
3.1 Charging the Electric Screwdriver
The electric screwdriver is powered by a 500mAh rechargeable battery. To charge:
- Locate the Type-C charging port on the electric handle.
- Connect the provided Type-C USB cable to the screwdriver and a compatible USB power source.
- A full charge typically takes approximately 1 hour. The battery indicator on the screwdriver's display will show charging status.
- It is recommended to use the factory-configured Type-C cable for charging to ensure optimal performance and safety.

Image: The electric screwdriver handle displaying the Type-C charging port and the battery/torque indicator screen.
3.2 Installing Screwdriver Bits
The screwdriver features a magnetic tip for easy bit installation:
- Select the appropriate precision bit for your task from the storage case.
- Insert the bit firmly into the magnetic tip of the electric screwdriver. The magnetic connection will secure the bit in place.
- To remove, simply pull the bit straight out.
Video: Demonstration of installing and removing screwdriver bits from a precision electric screwdriver, highlighting the magnetic tip and ease of use.
4. Malangizo Ogwiritsira Ntchito
4.1 Kuyatsa ndi Kuzimitsa
The screwdriver is designed for intuitive operation. There is no separate power on/off button. The device activates when the forward or reverse buttons are pressed and automatically enters standby mode when not in use.
4.2 Adjusting Torque Settings
The JOREST electric screwdriver offers 5 adjustable torque levels (0.15-0.75 N.m) for precise control. It also provides a 7 N.m manual torque for situations requiring extra force.
- To adjust the torque, press and hold the power button (often indicated by a circle or 'O' symbol) until the display blinks.
- Click the power button repeatedly to cycle through the 5 torque levels. The selected level will be displayed on the screen.
- For screws that are factory-secured with glue or require significant initial force, it is recommended to loosen them manually first using the manual handle, then switch to electric mode for efficient removal.
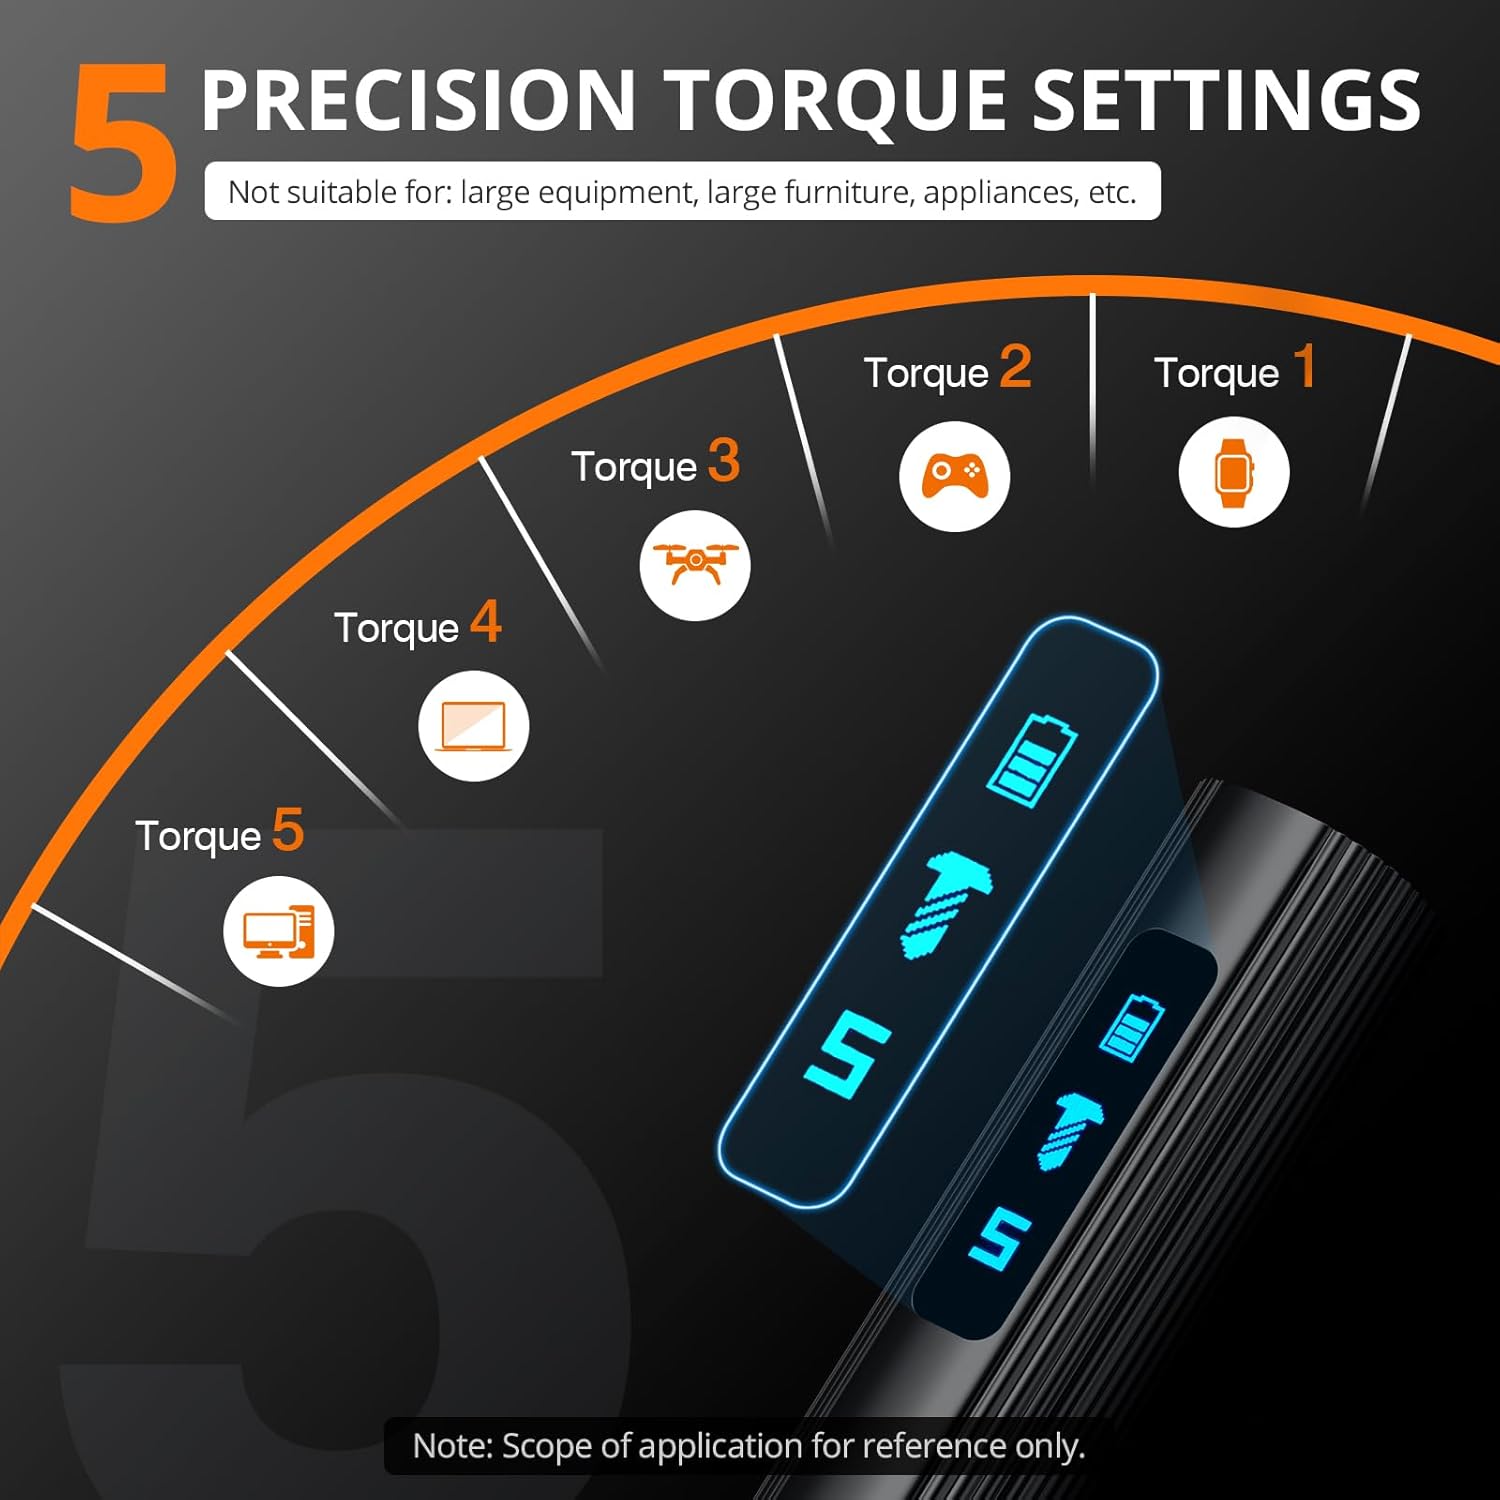
Image: Visual guide to the 5 precision torque settings, illustrating their suitability for different device types like watches, drones, and computers.
4.3 Kupita patsogolo ndi Kubwerera Mmbuyo
The screwdriver features dedicated buttons for forward (tightening) and reverse (loosening) operations:
- Press the top button (often indicated by an upward arrow or '>>' symbol) to tighten screws.
- Press the bottom button (often indicated by a downward arrow or '<<' symbol) to loosen screws.
Video: Demonstration of the forward and reverse functions of the electric screwdriver, showing how to tighten and loosen screws with ease.
4.4 Using the Built-in LED Lights
The electric screwdriver is equipped with four built-in LED lights to illuminate your workspace, enhancing visibility in dim conditions and ensuring precision.

Image: The electric screwdriver in use, with its LED lights illuminating a dark area during a repair task.
5. Mapulogalamu
The JOREST 155-in-1 Precision Electric Screwdriver kit is ideal for a wide range of delicate repair tasks, including but not limited to:
- Makompyuta ndi Malaputopu
- Cell Phones and Tablets
- Gaming Consoles (e.g., PS4, PS5, Xbox, Nintendo Switch) and Controllers
- RC Cars and Drones
- Watches and Glasses
- Other IT and small electronic devices
Zindikirani: This set is designed for precision work on small equipment and is not suitable for repairing large equipment or furniture.

Image: A visual representation of the wide range of applications for the screwdriver kit, including smartphones, laptops, gaming consoles, and smart home devices.
6. Kusamalira
6.1 Kusamalira Battery
To prolong the life of your screwdriver's battery:
- Always use the provided Type-C USB cable for charging.
- Pewani kuthimitsa batire pafupipafupi.
- Sungani screwdriver pamalo ozizira komanso ouma ngati simukugwiritsa ntchito.
6.2 Bit and Accessory Care
- Keep all bits and accessories clean and free from debris.
- Store all components securely in the magnetic storage case to prevent loss and damage.
- The magnetic design of the case helps keep bits organized and prevents them from falling out.

Image: The magnetic design of the storage case, illustrating how it securely holds screws and bits to prevent loss during repairs.
7. Mavuto
7.1 Screws Difficult to Loosen
If a screw is particularly tight or appears to be factory-secured with adhesive, the electric screwdriver may struggle to loosen it initially. In such cases:
- Use the manual handle to apply initial force and break the screw loose.
- Once loosened, switch to the electric mode for quick and effortless removal.
7.2 Screwdriver Not Operating
- Check the battery level indicator on the display. If low, recharge the device.
- Ensure the bit is correctly inserted into the magnetic tip.
8. Zofotokozera
| Mbali | Tsatanetsatane |
|---|---|
| Dzina lachitsanzo | Mini Electric Precision Screwdriver |
| Nambala Yachitsanzo Yachinthu | AJJOES0301ORDDER1 |
| Mtundu | Jorest |
| Mtundu | 155 in 1 Electric |
| Zakuthupi | Aluminiyamu |
| Miyeso Yazinthu | 22.5 x 12.8 x 5.8 masentimita |
| Kulemera kwa chinthu | 940g pa |
| Mphamvu ya Battery | 500mAh |
| Liwiro Lagalimoto | 200 rpm |
| Torque yamagetsi | 0.15-0.75 N.m (5 adjustable levels) |
| Manual Torque | 7 nm |
| Kulipira Port | Mtundu-C |
| Kuwala kwa LED | 4 zomangidwa |
9. Chitsimikizo ndi Thandizo
Specific warranty information for the JOREST 155-in-1 Precision Electric Screwdriver is not provided in the product details. For warranty claims, technical support, or any inquiries regarding your product, please refer to the contact information provided with your purchase or visit the official JOREST webmalo.