Mawu Oyamba
This manual provides detailed instructions for the installation, operation, and maintenance of your Zyyini B150M V3 Computer Motherboard. Please read this manual thoroughly before proceeding with installation to ensure proper setup and to prevent damage to the components. This motherboard is designed for desktop computers, supporting LGA 1151 CPUs and DDR4 memory, offering a stable and efficient platform for various computing needs.
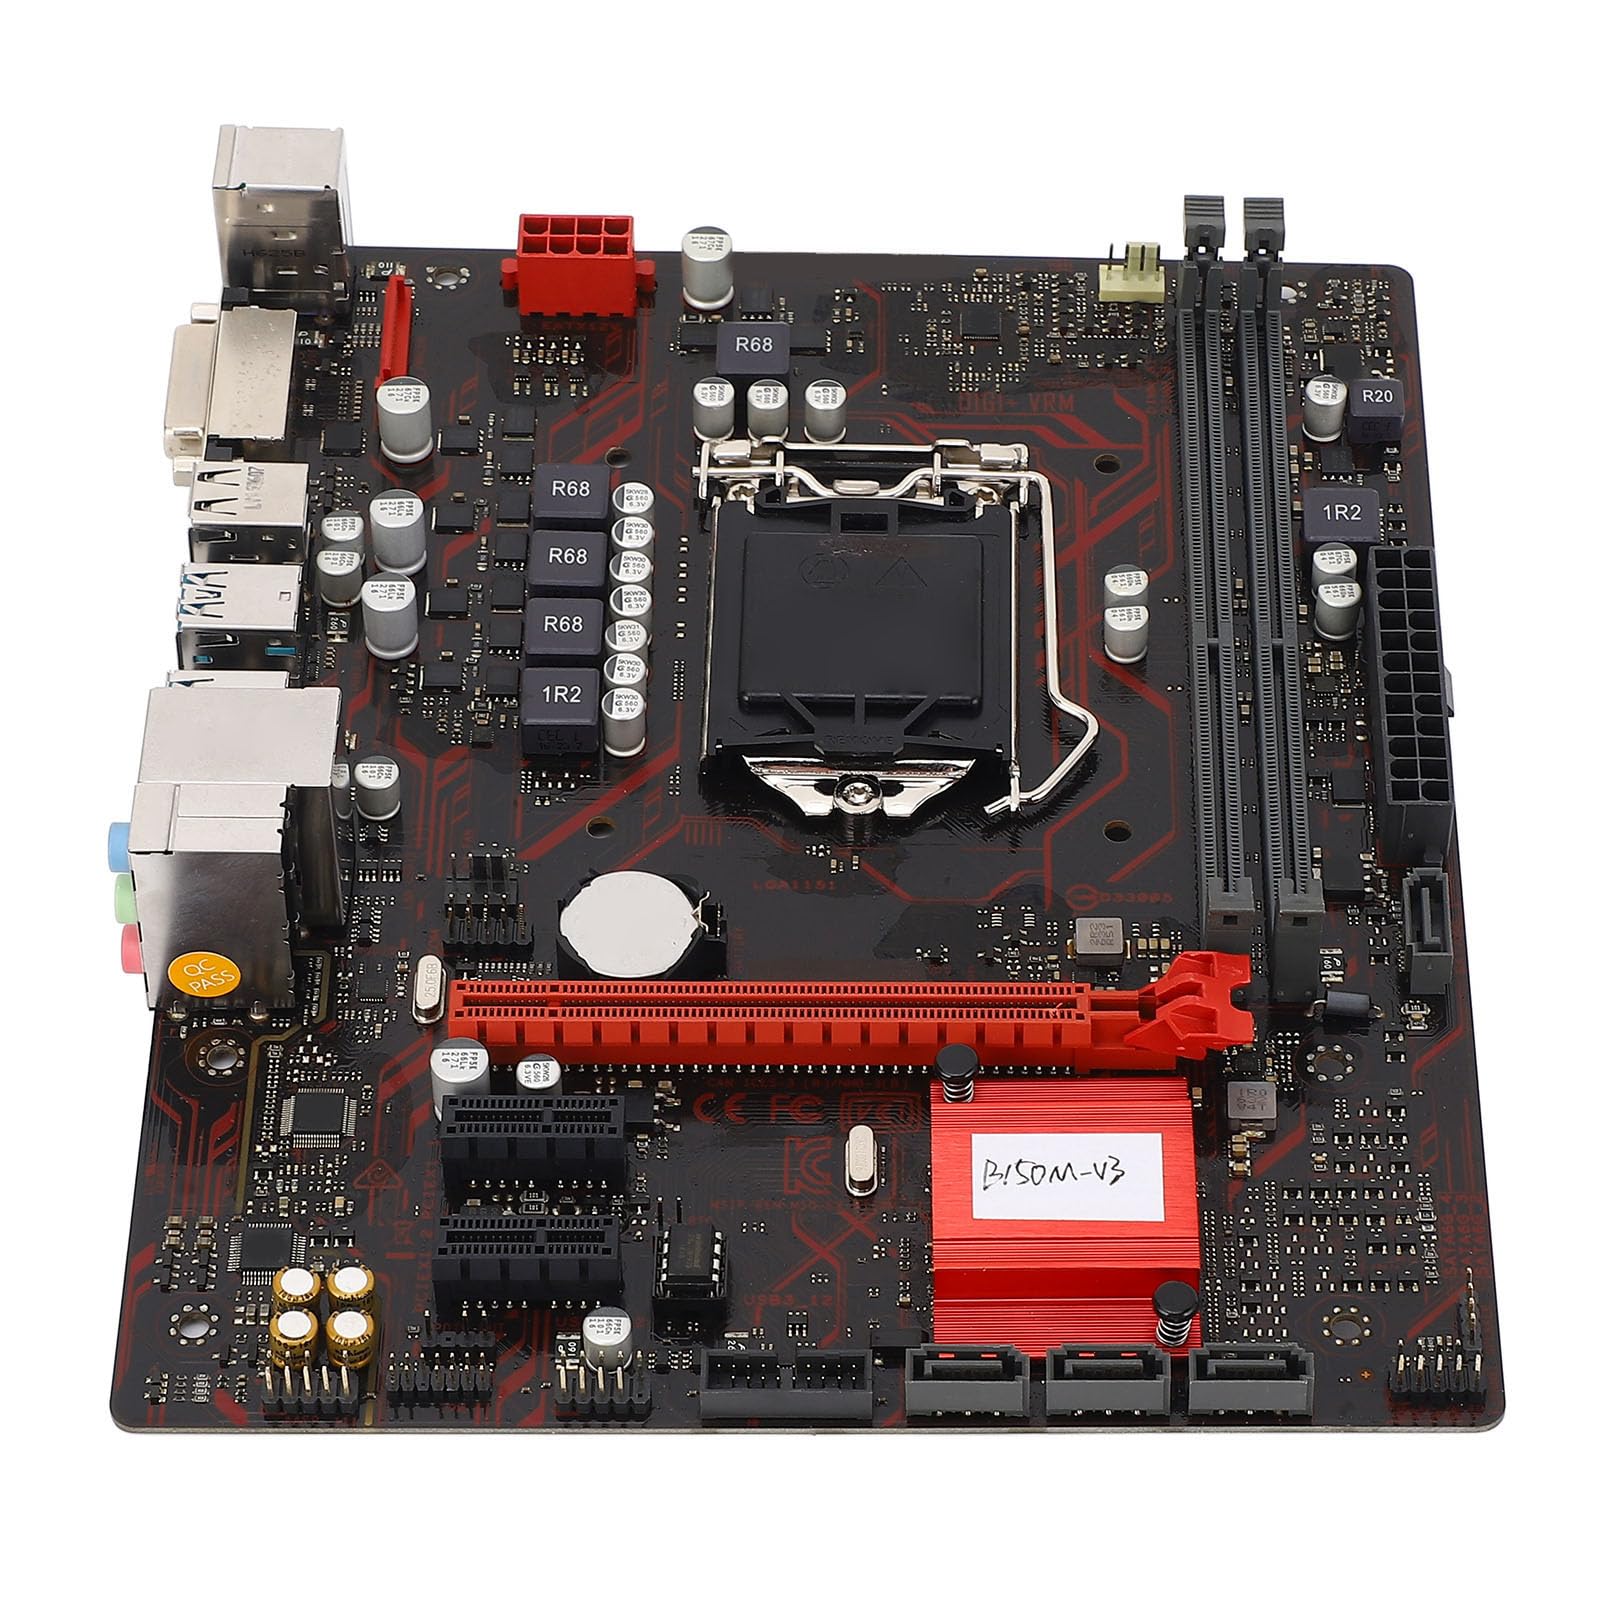
Chithunzi 1: Kuthaview of the Zyyini B150M V3 Motherboard.
Kukhazikitsa ndi Kuyika
Before beginning installation, ensure your workspace is clean and static-free. It is recommended to wear an anti-static wrist strap to prevent electrostatic discharge (ESD) damage to components.
1. Chitetezo
- Nthawi zonse tsegulani magetsi kuchokera pakhoma musanayike kapena kuchotsa zida zilizonse.
- Handle components by their edges to avoid touching sensitive circuits.
- Ensure proper grounding to prevent ESD.
- Refer to the CPU, memory, and other component manuals for specific installation instructions.
2. Mawonekedwe a Bolodi

Chithunzi 2: Pamwamba-pansi view highlighting key components and connectors on the motherboard.
Familiarize yourself with the locations of the CPU socket, memory slots, PCI-E slots, SATA ports, and power connectors before installation.
3. Kukhazikitsa CPU (LGA 1151)
- Pezani soketi ya LGA 1151 CPU pa bolodi la amayi.
- Kanikizani pang'onopang'ono cholowetsa katundu ndikuchikoka m'mbali kuti mutsegule chivundikiro cha soketi ya CPU.
- Carefully align the notches on your Intel Core i7/i5/i3/Pentium/Celeron (14nm) processor with the corresponding keys on the socket. Ensure the gold triangle on the CPU matches the triangle on the socket.
- Place the CPU gently into the socket without forcing it.
- Tsekani mbale yonyamulira katundu ndikukankhira chonyamulira katundu m'malo mwake mpaka chikankhire.

Chithunzi 3: Pafupi view of the LGA 1151 CPU socket, ready for processor installation.
4. Memory Installation (DDR4 DIMM)
The motherboard features two DDR4 DIMM slots, supporting dual-channel DDR4 2133MHz memory up to a maximum of 32GB.
- Tsegulani ma clip kumapeto onse a malo a DIMM.
- Gwirizanitsani notch pa DDR4 memory module ndi kiyi mu DIMM slot.
- Ikani module yokumbukira mwamphamvu mu malo osungira mpaka ma clips alowe m'malo mwake. Onetsetsani kuti ma clips onse awiri atsekedwa.

Figure 4: The two DDR4 DIMM slots for memory installation.
5. Storage Device Installation (SATA III & M.2)
The motherboard provides 4 x Serial ATA III interfaces and 1 x M.2 slot for storage devices.
- Zipangizo za SATA: Connect one end of a SATA data cable to a SATA III port on the motherboard and the other end to your SATA hard drive or SSD. Connect the SATA power cable from your power supply to the drive.
- M.2 Devices: Insert your M.2 SSD into the M.2 slot, securing it with the provided screw.
6. Expansion Card Installation (PCI-E)
The motherboard includes 1 x PCI-E x16 graphics card slot and 2 x PCI-E x1 slots for expansion cards.
- Align your PCI-E expansion card (e.g., graphics card, sound card, network card) with the desired PCI-E slot.
- Press the card firmly into the slot until it is fully seated. Secure the card with a screw to the chassis.
7. Connecting Peripherals and Front Panel
Connect your USB devices, DVI display, audio devices, and Ethernet cable to the rear I/O panel. Connect the front panel connectors (power button, reset button, USB ports, audio jacks) from your PC case to the corresponding headers on the motherboard.

Chithunzi 5: Tsatanetsatane view of the rear I/O panel, showing USB, DVI, Ethernet, and audio ports.
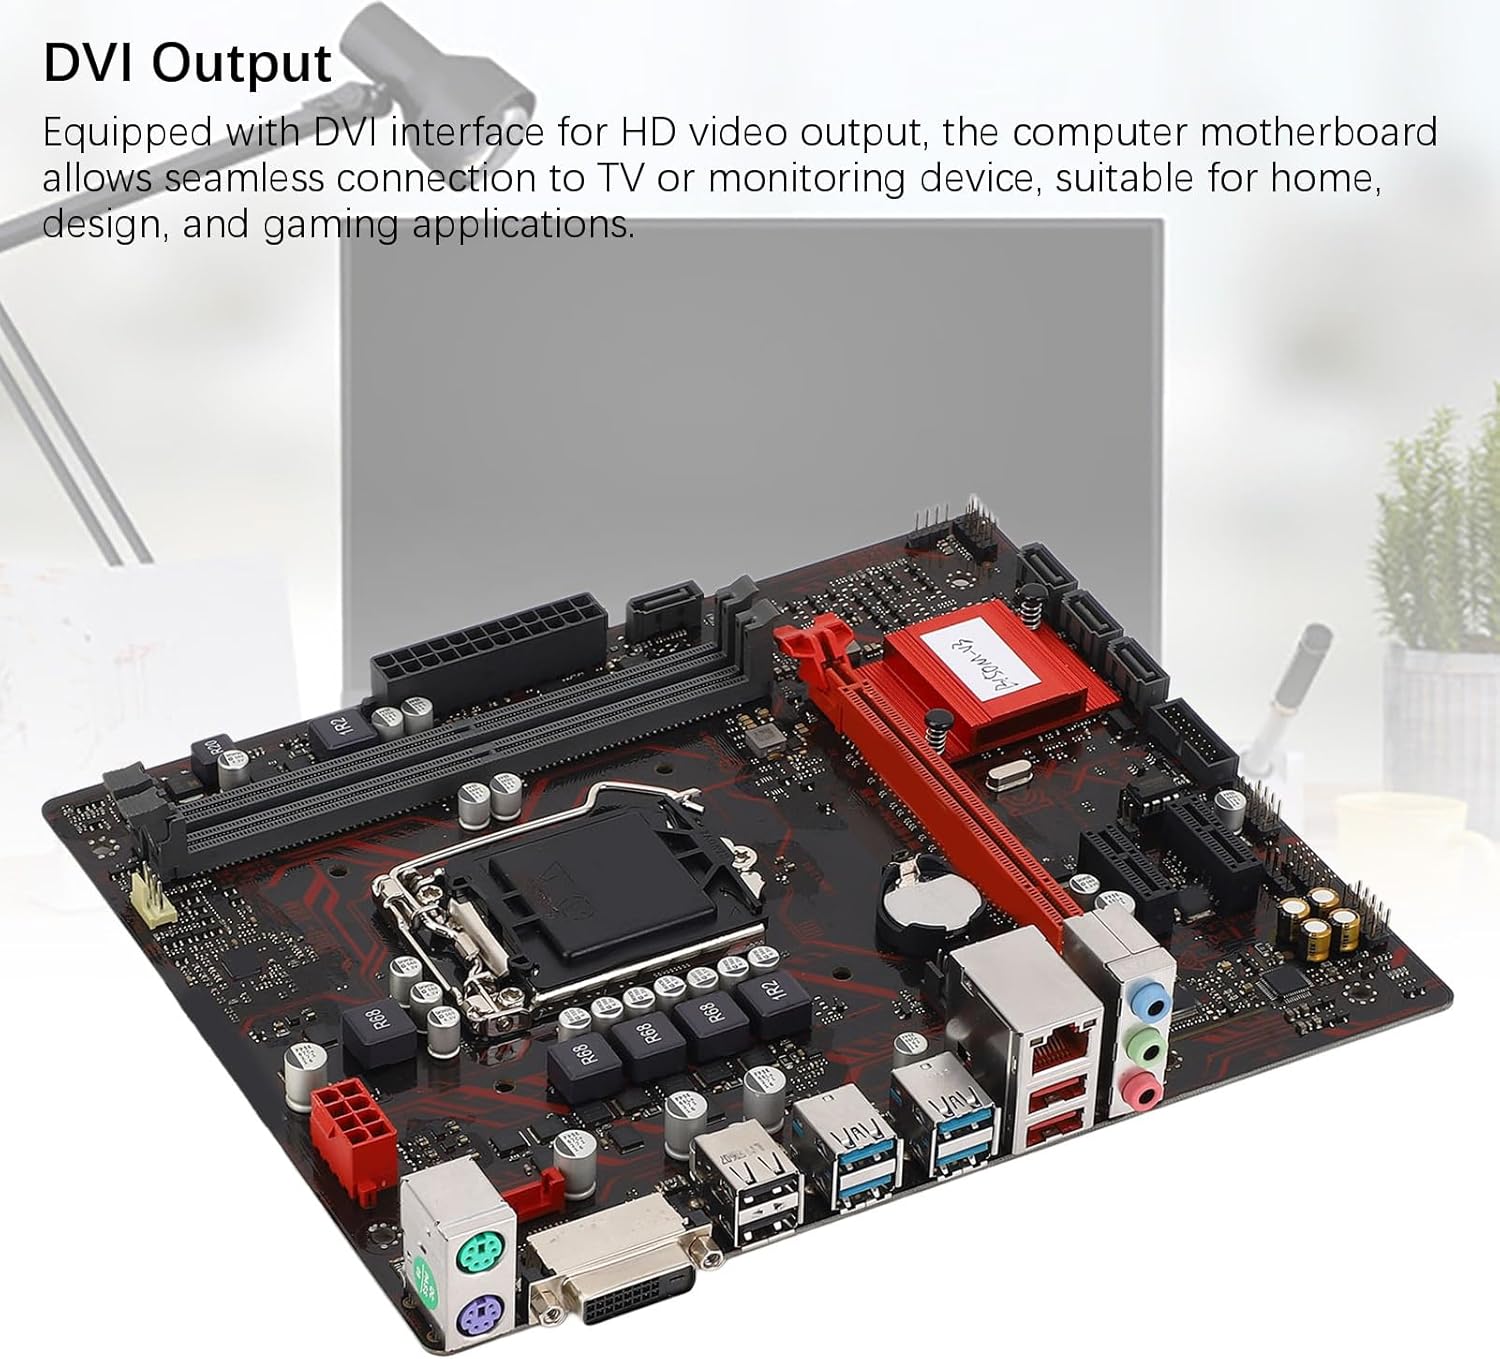
Figure 6: The DVI interface for connecting a display.
8. Malumikizidwe a Mphamvu
Connect the 24-pin ATX power connector and the 8-pin CPU power connector from your power supply to the respective ports on the motherboard. Ensure they are firmly seated.

Chithunzi 7: Chopindika view showing the location of power connectors and other ports.
Malangizo Ogwiritsira Ntchito
1. Kuyamba Koyamba
After all components are installed and connected, power on your system. The system should initiate the boot process. If no display appears, refer to the troubleshooting section.
2. Kasinthidwe ka BIOS/UEFI
During boot-up, press the designated key (usually DEL or F2) to enter the BIOS/UEFI setup. Here you can configure boot order, system time, and other advanced settings. Save changes before exiting.
3. Kuyika kwa Dalaivala
After installing your operating system, install the necessary drivers for the motherboard chipset, network, and audio. These are typically provided on a driver CD or available for download from the manufacturer's webmalo.
Kusamalira
1. Dust Cleaning
Regularly clean the inside of your computer case to prevent dust buildup, which can lead to overheating and component failure. Use compressed air to gently remove dust from fans, heatsinks, and motherboard surfaces.
2. Zosintha za BIOS
Nthawi ndi nthawi fufuzani wopanga website for BIOS updates. BIOS updates can improve system stability, add support for new hardware, or fix bugs. Follow the update instructions carefully to avoid damaging the motherboard.
Kusaka zolakwika
1. Palibe Mphamvu
- Ensure the power supply is connected to the wall outlet and switched on.
- Verify that the 24-pin and 8-pin power connectors are securely attached to the motherboard.
- Check the front panel power switch connection to the motherboard.
2. Palibe Chiwonetsero
- Confirm that the monitor is connected to the correct video output (DVI) on the motherboard or graphics card and is powered on.
- Reseat the memory modules. Try booting with only one memory module installed.
- Reseat the graphics card (if applicable).
- Ensure the CPU is properly installed and the CPU cooler is securely attached.
3. Kusakhazikika kwadongosolo / Zowonongeka
- Check for overheating. Ensure all fans are working and heatsinks are clean.
- Verify that all components (CPU, RAM, storage) are properly seated.
- Thamangani zida zowunikira kukumbukira kuti muwone ngati RAM yolakwika.
- Onetsetsani kuti madalaivala onse ali ndi nthawi.
Zofotokozera

Figure 8: The motherboard's robust construction ensures stable performance and longevity.
| Mbali | Tsatanetsatane |
|---|---|
| Mtundu wa Motherboard | B150M-V3 |
| Chipset | B150 Chipset |
| CPU Socket | LGA 1151 |
| Compatible CPU Type | Intel Core i7, i5, i3, Pentium, Celeron (14nm processors) |
| Mtundu wa Memory | 2 x DDR4 DIMM (Dual Channel) |
| Kuthamanga kwa Memory | 2133MHz |
| Kuchuluka kwa Memory | 32 GB |
| PCI-E Standard | PCI-E 3.0 |
| PCI-E x16 Slots | 1 |
| PCI-E x1 Slots | 2 |
| Malo Osungira Zinthu | 4 x Serial ATA III, 1 x M.2 |
| USB Interfaces (Rear) | 4 × USB3.0, 4 × USB2.0 |
| USB Interfaces (Internal) | 1 x USB3.0 header, 1 x USB2.0 header |
| Kanema Wamakanema | 1x DVI |
| Network Chip | Realtek RTL8111GR Gigabit Ethernet |
| Chip Chip | Realtek ALC887 8-Channel |
| Zolumikizira Mphamvu | One 8-Pin, One 24-Pin |
| Fomu Factor | M-ATX |
| Njira Yopatsira Mphamvu | 5 gawo |
| Njira Zina | RJ45, Chassis Fan, Internal Speaker, System Panel, Sound, PS/2 Mouse, PS/2 Keyboard, COM |
Chidziwitso cha Chitsimikizo
For specific warranty terms and conditions, please refer to the documentation provided with your purchase or visit the official Zyyini webmalo. Chitsimikizo chawaranti chimakhala ndi zolakwika pazapangidwe ndi kapangidwe kake pakagwiritsidwe ntchito bwino.
Thandizo la Makasitomala
If you encounter any issues that cannot be resolved using this manual, please contact your retailer or visit the Zyyini official support channels for assistance. Have your product model number (B150M-V3) and purchase details ready when seeking support.